Oracle to Snowflake with LakeXpress, Step by Step

LakeXpress exports the 8 TPC-H tables of an Oracle schema, 8.66 million rows, to Parquet files on S3 and loads them into Snowflake tables. After a one-time setup of Oracle, SQL Server, AWS and Snowflake, the pipeline is one JSON file and three commands. On a laptop, the sync took 35.8 seconds: 19.2 s to export to S3 and 16.6 s to load into Snowflake on an XSMALL warehouse. LakeXpress only gets write access to one S3 folder and a Snowflake role limited to one database.
LakeXpress exports database tables to Parquet files on cloud storage and publishes them as tables in a data lakehouse. This tutorial takes an Oracle schema, the 8 TPC-H tables, to Snowflake through S3, starting from the LakeXpress trial download.
Once the systems are set up, the whole pipeline is three commands (the second one is shortened here, step 7 has it in full):
./LakeXpress lxdb init      -a lx_credentials.json --lxdb_auth_id lxdb_mssql
./LakeXpress config create  -a lx_credentials.json --lxdb_auth_id lxdb_mssql --sync_id oracle_tpch_to_snowflake ...
./LakeXpress sync           -a lx_credentials.json --lxdb_auth_id lxdb_mssql --sync_id oracle_tpch_to_snowflake
The sync exported 8.66 million rows from Oracle to S3 and loaded them into Snowflake in 36 seconds, on a laptop.
What you will build
LakeXpress discovers the 8 tables of the TPCH schema in Oracle (scale factor 1, which has 8.66 million rows), exports them in parallel as compressed Parquet files to S3, and loads them into internal Snowflake tables. Four systems are involved:
 Oracle
Source database, read only.
 SQL Server
LakeXpress DB: sync configurations, run history, per-table metrics.
 AWS S3
Where the Parquet files are written, and where Snowflake reads them.
 Snowflake
Target: one internal table per source table.
LakeXpress runs on your machine, between them. It reads from Oracle, writes to S3, and sends SQL statements to Snowflake. The data never goes through SQL Server, and it goes from S3 to Snowflake directly.
The tutorial has two parts:
Standard setup of each system. Skip any step you already have.
One JSON file and three commands.
Every command is given for Linux (bash) and for Windows (PowerShell). Pick your system in the tabs. When a command is the same on both, it is shown once.
Versions used in this tutorial
| Component | Version |
|---|---|
| LakeXpress | 0.6.7, with the bundled FastBCP 1.6.8 |
| Oracle | Oracle AI Database 26ai Free, release 23.26.3 |
| SQL Server | SQL Server 2025 |
| AWS CLI | 2.40.2 |
| Snowflake | 10.42, Standard edition, trial account on AWS in eu-west-1 |
The outputs shown come from the Windows 11 run. lxdb init, config list and sync were also run with the Linux build of the same version, on Ubuntu 24.04 under WSL 2, against the same databases and cloud accounts, with the same result.
Prerequisites
You need access to four systems:
OracleA database with the 8 TPC-H tables in a TPCH schema. A DBA account is needed once, to give tpch read access to the catalog metadata (step 2).
SQL ServerAn instance where you can create a database and a login.
An AWS account where you can create an S3 bucket, an IAM user and an IAM role.
SnowflakeA Snowflake account with access to the ACCOUNTADMIN role, for the setup only. LakeXpress itself connects with a role limited to one database.
And two tools, for the setup steps only. They can run on any machine that reaches the systems:
| Tool | Used for |
|---|---|
| The AWS CLI | The bucket, the IAM user and the IAM role, in step 4 |
sqlcmd or SQL Server Management Studio | The LakeXpress DB and its login, in step 3 |
LakeXpress itself needs nothing installed: no Python, no Oracle client, no ODBC driver, no AWS CLI. On its machine, it only needs the AWS profile of step 4.1, the ~/.aws files that aws configure writes.
Part 1: set up the systems
LakeXpress is installed, Oracle gets two settings, and SQL Server, AWS and Snowflake get their standard setup. LakeXpress runs in part 2.
Step 1: install LakeXpress
Goal: LakeXpress unzipped, with its license, answering --version.
Request a trial at arpe.io/get-trial?product=LakeXpress. The form asks for an email address, and optionally a first and last name. You can also sign in with GitHub, Google or Microsoft, which fills and submits the form for you.
You receive an email with a download link for each platform and a 30-day license file. The links are personal and limited in time.
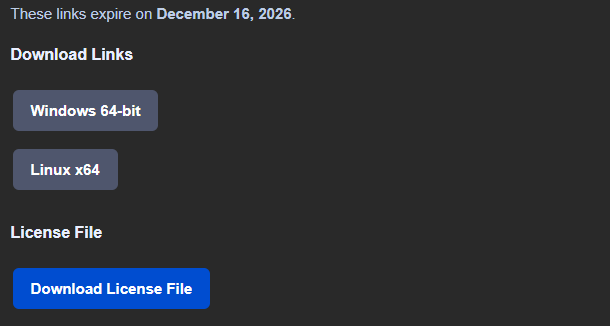
Download two files:
| File | Content |
|---|---|
LakeXpress-Full-linux-x64.zip or LakeXpress-Full-win-x64.zip | LakeXpress and the FastBCP engine it uses to extract data |
TRIAL-LakeXpress-<timestamp>-<id>.lic | The license, valid for 30 days, for both LakeXpress and FastBCP |
Unzip the archive, and save the license file where LakeXpress looks for it by default:
- Linux
- Windows (PowerShell)
unzip LakeXpress-Full-linux-x64.zip -d LakeXpress
cd LakeXpress
chmod +x LakeXpress

mkdir -p ~/.lakexpress
cp ~/Downloads/TRIAL-LakeXpress-*.lic ~/.lakexpress/license.lic

./LakeXpress --version
Expand-Archive -Path .\LakeXpress-Full-win-x64.zip -DestinationPath .\LakeXpress
cd LakeXpress

New-Item -ItemType Directory -Force "$env:APPDATA\LakeXpress" | Out-Null
Copy-Item "$HOME\Downloads\TRIAL-LakeXpress-*.lic" "$env:APPDATA\LakeXpress\license.lic"

.\LakeXpress.exe --version
LakeXpress 0.6.7 (build 2026-11-17T19:49:29Z)
LakeXpress also looks for license.lic in the current directory, so you can save the license as license.lic in the LakeXpress folder, next to the executable. It is then found only when LakeXpress is started from that folder.
All the commands of this tutorial are run from the LakeXpress directory. Keep the archive layout as is: LakeXpress finds its FastBCP engine in engine/ by itself.
Every command except --version and --help needs the license, and starts by printing which one it found:
[...] License ID: TRIAL-LakeXpress-20261116165136-8f0aa0
[...] Source: license file (C:\Users\you\AppData\Roaming\LakeXpress\license.lic)
[...] Valid until: 2026-12-16T16:51:37.496947+00:00 (29 days remaining)
Other places for the license
LakeXpress looks for the license in this order and uses the first one it finds:
- The
LAKEXPRESS_LICENSEenvironment variable, holding the content of the license file. This suits containers and CI --license <text>, the same content on the command line--license_file <path>, a license file anywhere on disk~/.lakexpress/license.licon Linux,%APPDATA%\LakeXpress\license.licon Windowslicense.licin the current directory
What is in the archive
LakeXpress/
├── LakeXpress               - Main executable (LakeXpress.exe on Windows)
├── README.txt
├── LakeXpress-sbom.*        - Software Bill of Materials and checksums
└── engine/
    ├── FastBCP              - Bundled FastBCP engine (FastBCP.exe on Windows)
    ├── FastBCP-sbom.*
    ├── LICENSE.txt
    └── README.md
Step 2: the Oracle source
Goal: tpch can read the Oracle catalog metadata, and the TPCH tables have up-to-date statistics.
This tutorial starts from an Oracle database that already holds the 8 TPC-H tables at scale factor 1, in the TPCH schema owned by the user tpch. Here it is reached on host localhost, port 1521, service name FREEPDB1. Use your own values in step 5.
LakeXpress only reads from the source, but it needs two things there. First, a DBA, for example system, grants a role once:
GRANT SELECT_CATALOG_ROLE TO tpch;
The role lets FastBCP read the catalog views DBA_EXTENTS and DBA_OBJECTS, to split a large table into ROWID ranges and read these ranges in parallel. Without it, the export of every large table fails with The user must have SELECT_CATALOG_ROLE.
Second, the tables need statistics. tpch can gather them itself, as the owner of the schema, and Oracle's automatic statistics job may already have done it:
EXEC DBMS_STATS.GATHER_SCHEMA_STATS('TPCH');
The statistics fill NUM_ROWS in ALL_TABLES, where LakeXpress reads its row estimates. It exports the largest tables first, and splits the tables of 100,000 rows or more (the default threshold). A table whose statistics were never gathered shows 0 rows and is exported in a single stream: complete and correct, only slower.
Done when this query returns the row counts. They are the estimates LakeXpress will see:
SELECT table_name, num_rows
FROM all_tables
WHERE owner = 'TPCH'
ORDER BY num_rows DESC;
| TABLE_NAME | NUM_ROWS |
|---|---|
| LINEITEM | 6001215 |
| ORDERS | 1500000 |
| PARTSUPP | 800000 |
| PART | 200000 |
| CUSTOMER | 150000 |
| SUPPLIER | 10000 |
| NATION | 25 |
| REGION | 5 |
Step 3: the LakeXpress DB on SQL Server
Goal: an empty lxdb database, owned by a login LakeXpress uses.
LakeXpress keeps its sync configurations, the history of every run and per-table metrics in a database of its own, the LakeXpress DB. This is what makes a run resumable and auditable. It can live in SQL Server, PostgreSQL, MySQL, SQLite or DuckDB. Here it is SQL Server.
You only create the database and its owner; LakeXpress creates its tables. Save this as create_lxdb.sql:
CREATE DATABASE lxdb;
GO
CREATE LOGIN lakexpress_admin WITH PASSWORD = 'Your_LxdbPassword1';
GO
USE lxdb;
GO
CREATE USER lakexpress_admin FOR LOGIN lakexpress_admin;
ALTER ROLE db_owner ADD MEMBER lakexpress_admin;
GO
Run it as a SQL Server administrator, with SQL Server Management Studio or sqlcmd:
- SQL Server login
- Windows authentication
sqlcmd -S "localhost,1433" -U sa -P "your_sa_password" -C -i create_lxdb.sql
sqlcmd -S "localhost,1433" -E -C -i create_lxdb.sql
Done when the new login connects. LakeXpress connects the same way, with a login and a password over TCP:
sqlcmd -S "localhost,1433" -U lakexpress_admin -P "Your_LxdbPassword1" -C -d lxdb -W -Q "SELECT DB_NAME() AS db, SUSER_SNAME() AS login, IS_MEMBER('db_owner') AS is_owner"
| db | login | is_owner |
|---|---|---|
| lxdb | lakexpress_admin | 1 |
If this fails, two SQL Server settings are the usual cause: the server must accept SQL Server logins ("SQL Server and Windows Authentication mode"), and the TCP/IP protocol must be enabled on port 1433.
Step 4: the S3 bucket and the Snowflake stage
Goal: an S3 folder that LakeXpress can write to and Snowflake can read, a Snowflake stage on that folder, and a Snowflake user for LakeXpress with its token. Each identity gets only the rights it needs.
This is the longest step, and it is standard AWS and Snowflake setup: LakeXpress is not involved yet. It is also where most of the problems met while writing this tutorial came from; the Troubleshooting table lists them.
LakeXpress writes the Parquet files to S3, then asks Snowflake to load them with COPY INTO. Snowflake reads them through an external stage that must point to exactly the folder LakeXpress writes to. Here that folder is s3://aetplakexpress/snowflake/. Replace it with your own bucket and prefix everywhere it appears.
Three identities are involved on the AWS side:
| Who | How | Rights |
|---|---|---|
| You, for the setup | Your own AWS CLI profile | Create the bucket, the IAM user and the IAM role |
| LakeXpress | Its own IAM user and AWS CLI profile | Write only, on s3://aetplakexpress/snowflake/ |
| Snowflake | An IAM role that Snowflake assumes | Read only, on s3://aetplakexpress/snowflake/ |
On the Snowflake side, LakeXpress gets a dedicated user and role in step 4.6: they can create schemas in one database and use one warehouse and one stage, nothing else.
Each side needs an identifier created by the other, so the setup goes back and forth:
The 30-day trial is enough for this tutorial. A Snowflake account lives in one cloud region for good, so take the region of your bucket, here AWS eu-west-1. Reading a bucket in another region adds AWS data-transfer fees and latency. SELECT CURRENT_REGION(); tells you where an account is (AWS_EU_WEST_1).
Note your account identifier now: LakeXpress needs it in step 5. Its form is <organization>-<account>, for example MYORG-LAKEXPRESS_IE. It is the first part of the login URL, it is under "View account details" in the account menu of Snowsight, and this query returns it:
SELECT CURRENT_ORGANIZATION_NAME() || '-' || CURRENT_ACCOUNT_NAME();
4.1 AWS: the bucket and the profile
The setup commands of this step run with your own AWS CLI profile, written your-admin-profile below. It must be allowed to create a bucket, an IAM user and an IAM role. Create the bucket if it does not exist:
aws s3 mb s3://aetplakexpress --region eu-west-1 --profile your-admin-profile
LakeXpress does not use that profile. It gets its own IAM user, here lakexpress-s3-writer, which can only write objects under the folder. Save its policy as lakexpress_write_policy.json:
{
  "Version": "2012-10-17",
  "Statement": [
    {
      "Effect": "Allow",
      "Action": "s3:PutObject",
      "Resource": "arn:aws:s3:::aetplakexpress/snowflake/*"
    }
  ]
}
This single action is all the sync needs, including when a later run replaces the files of the previous one. The runs of this tutorial were made with exactly this policy. The user cannot list the bucket, read the files back or delete them.
Create the user, attach the policy, and create an access key:
aws iam create-user --user-name lakexpress-s3-writer --profile your-admin-profile

aws iam put-user-policy --user-name lakexpress-s3-writer --policy-name lakexpress-s3-write --policy-document file://lakexpress_write_policy.json --profile your-admin-profile

aws iam create-access-key --user-name lakexpress-s3-writer --profile your-admin-profile
create-access-key prints an AccessKeyId and a SecretAccessKey, once. Store them in an AWS CLI profile for LakeXpress, here lakexpress-writer:
aws configure --profile lakexpress-writer
A profile is defined in ~/.aws/config and ~/.aws/credentials on Linux, and in %USERPROFILE%\.aws\ on Windows. aws configure writes both files:
# config
[profile lakexpress-writer]
region = eu-west-1

# credentials
[lakexpress-writer]
aws_access_key_id = YOUR_ACCESS_KEY
aws_secret_access_key = YOUR_SECRET_KEY
Check who the profile is, and that it can do nothing but write:
aws sts get-caller-identity --profile lakexpress-writer
aws s3 ls s3://aetplakexpress/ --profile lakexpress-writer
arn:aws:iam::123456789012:user/lakexpress-s3-writer

An error occurred (AccessDenied) when calling the ListObjectsV2 operation: User: arn:aws:iam::123456789012:user/lakexpress-s3-writer is not authorized to perform: s3:ListBucket on resource: "arn:aws:s3:::aetplakexpress" because no identity-based policy allows the s3:ListBucket action
The first command shows the Arn of the new user. The second one must fail: the refusal is the expected result.
4.2 AWS: the IAM role for Snowflake
Snowflake gets its own read access to the folder through an IAM role, here snowflake-lakexpress. Save its read policy as s3_read_policy.json:
{
  "Version": "2012-10-17",
  "Statement": [
    {
      "Effect": "Allow",
      "Action": ["s3:GetObject", "s3:GetObjectVersion"],
      "Resource": "arn:aws:s3:::aetplakexpress/snowflake/*"
    },
    {
      "Effect": "Allow",
      "Action": ["s3:ListBucket", "s3:GetBucketLocation"],
      "Resource": "arn:aws:s3:::aetplakexpress",
      "Condition": { "StringLike": { "s3:prefix": ["snowflake/*"] } }
    }
  ]
}
A role cannot be created without a trust policy, and the real one needs values that Snowflake only produces in step 4.3. So the role starts with a temporary trust policy that trusts your own AWS account. Save it as trust_policy.json, with your 12-digit account ID:
{
  "Version": "2012-10-17",
  "Statement": [
    {
      "Effect": "Allow",
      "Principal": { "AWS": "arn:aws:iam::123456789012:root" },
      "Action": "sts:AssumeRole",
      "Condition": { "StringEquals": { "sts:ExternalId": "0000" } }
    }
  ]
}
Create the role and attach the read policy:
aws iam create-role --role-name snowflake-lakexpress --assume-role-policy-document file://trust_policy.json --profile your-admin-profile

aws iam put-role-policy --role-name snowflake-lakexpress --policy-name lakexpress-s3-read --policy-document file://s3_read_policy.json --profile your-admin-profile
create-role prints the ARN of the role, arn:aws:iam::123456789012:role/snowflake-lakexpress, used in the next step.
4.3 Snowflake: the database and the storage integration
In a Snowflake worksheet, create the warehouse and the database:
USE ROLE SYSADMIN;
CREATE WAREHOUSE IF NOT EXISTS COMPUTE_WH
  WAREHOUSE_SIZE = XSMALL
  AUTO_SUSPEND = 60
  AUTO_RESUME = TRUE
  INITIALLY_SUSPENDED = TRUE;
CREATE DATABASE IF NOT EXISTS LAKEXPRESS_DB;
Warehouse COMPUTE_WH successfully created.
Database LAKEXPRESS_DB successfully created.
The warehouse runs the COPY INTO statements that load the tables. To keep this tutorial simple, it has the smallest size, XSMALL, which loaded the 8.66 million rows in under 17 seconds. For larger volumes, choose a bigger size.
It suspends after 60 seconds without work and resumes by itself on the next statement, so it costs nothing while idle (each resume is billed for at least 60 seconds). If the account already has a COMPUTE_WH, as an account created by the sign-up form does, the statement leaves it unchanged.
Then create the storage integration, with the ARN of the role of step 4.2:
USE ROLE ACCOUNTADMIN;
CREATE STORAGE INTEGRATION IF NOT EXISTS LAKEXPRESS_S3_INT
  TYPE = EXTERNAL_STAGE
  STORAGE_PROVIDER = 'S3'
  ENABLED = TRUE
  STORAGE_AWS_ROLE_ARN = 'arn:aws:iam::123456789012:role/snowflake-lakexpress'
  STORAGE_ALLOWED_LOCATIONS = ('s3://aetplakexpress/snowflake/');

GRANT USAGE ON INTEGRATION LAKEXPRESS_S3_INT TO ROLE SYSADMIN;

DESC INTEGRATION LAKEXPRESS_S3_INT;
Integration LAKEXPRESS_S3_INT successfully created.
This part needs ACCOUNTADMIN: by default, no other role has the CREATE INTEGRATION privilege. With SYSADMIN, the statement fails with Insufficient privileges to operate on account ... SYSADMIN must have CREATE INTEGRATION granted on ACCOUNT. The GRANT then lets SYSADMIN create the stage on the integration, in step 4.5.
In the result of DESC INTEGRATION, note two values:
| Property | Looks like |
|---|---|
STORAGE_AWS_IAM_USER_ARN | arn:aws:iam::987654321098:user/abcd-s-xxxx |
STORAGE_AWS_EXTERNAL_ID | AB12345_SFCRole=1_AbCdEf... |
4.4 AWS: the trust policy
Back in AWS, replace the content of trust_policy.json with the two values, and apply it:
{
  "Version": "2012-10-17",
  "Statement": [
    {
      "Effect": "Allow",
      "Principal": { "AWS": "<STORAGE_AWS_IAM_USER_ARN>" },
      "Action": "sts:AssumeRole",
      "Condition": { "StringEquals": { "sts:ExternalId": "<STORAGE_AWS_EXTERNAL_ID>" } }
    }
  ]
}
aws iam update-assume-role-policy --role-name snowflake-lakexpress --policy-document file://trust_policy.json --profile your-admin-profile
The command prints nothing when it succeeds. From now on, only this Snowflake account can assume the role. AWS takes a few seconds to apply the change, so wait about 20 seconds before the next step.
Do not run CREATE OR REPLACE STORAGE INTEGRATION later: it generates a new external ID, and the trust policy would have to be updated again.
4.5 Snowflake: the stage
USE ROLE SYSADMIN;
CREATE STAGE IF NOT EXISTS LAKEXPRESS_DB.PUBLIC.AWSS3_AWDW_STAGE
  URL = 's3://aetplakexpress/snowflake/'
  STORAGE_INTEGRATION = LAKEXPRESS_S3_INT;

DESC STAGE LAKEXPRESS_DB.PUBLIC.AWSS3_AWDW_STAGE;
LIST @LAKEXPRESS_DB.PUBLIC.AWSS3_AWDW_STAGE;
Stage area AWSS3_AWDW_STAGE successfully created.
Done when DESC STAGE shows s3://aetplakexpress/snowflake/ on its STAGE_LOCATION line, and LIST returns without an access error (the folder may still be empty). An access error means that the trust policy of step 4.4 or the read policy of step 4.2 does not match.
LakeXpress checks before publishing that the stage URL is its own S3 folder, and stops with an error naming both if they differ. The stage is in the PUBLIC schema because this is where LakeXpress looks for a stage given without a schema. Its name, AWSS3_AWDW_STAGE, is the one used for this run. Any name works, as long as step 5 uses the same.
4.6 Snowflake: the user and its token
LakeXpress gets its own Snowflake user and its own role, with only the privileges the sync needs. It authenticates with a programmatic access token. A token raises no MFA prompt, which suits a command-line tool. Four things to do, in a worksheet.
1. Create the role and the user. The user has the type SERVICE: it has no password and cannot sign in to Snowsight.
USE ROLE SECURITYADMIN;
CREATE ROLE IF NOT EXISTS LAKEXPRESS_ROLE;
GRANT ROLE LAKEXPRESS_ROLE TO ROLE SYSADMIN;

CREATE USER IF NOT EXISTS LAKEXPRESS_USER
  TYPE = SERVICE
  DEFAULT_ROLE = LAKEXPRESS_ROLE
  DEFAULT_WAREHOUSE = COMPUTE_WH;
GRANT ROLE LAKEXPRESS_ROLE TO USER LAKEXPRESS_USER;
Granting the role to SYSADMIN lets your admin users read and manage the tables that LakeXpress creates.
2. Grant the role what the sync needs.
USE ROLE SYSADMIN;
GRANT USAGE ON WAREHOUSE COMPUTE_WH TO ROLE LAKEXPRESS_ROLE;
GRANT USAGE, CREATE SCHEMA ON DATABASE LAKEXPRESS_DB TO ROLE LAKEXPRESS_ROLE;
GRANT USAGE ON SCHEMA LAKEXPRESS_DB.PUBLIC TO ROLE LAKEXPRESS_ROLE;
GRANT USAGE ON STAGE LAKEXPRESS_DB.PUBLIC.AWSS3_AWDW_STAGE TO ROLE LAKEXPRESS_ROLE;
| Privilege | What LakeXpress does with it |
|---|---|
USAGE on the warehouse | Runs the COPY INTO statements |
USAGE, CREATE SCHEMA on the database | Creates the ORA_TPCH schema, which it then owns |
USAGE on the PUBLIC schema | Reaches the stage |
USAGE on the stage | Reads the Parquet files |
These five privileges are the whole list, and the runs of this tutorial were made with exactly them. LakeXpress owns the schema it creates, so it needs no other privilege to create, load, drop and recreate the tables in it. It gets nothing on the storage integration: only the owner of the stage uses it.
3. Attach a network policy to the user. Snowflake refuses a token for a user that no network policy covers (Network policy is required.):
USE ROLE SECURITYADMIN;
CREATE NETWORK POLICY IF NOT EXISTS lakexpress_user_policy ALLOWED_IP_LIST = ('203.0.113.25/32');
ALTER USER LAKEXPRESS_USER SET NETWORK_POLICY = lakexpress_user_policy;
Replace 203.0.113.25/32 with the public address or range LakeXpress connects from. checkip.amazonaws.com returns your current one. The policy is attached to the service user only, so it does not restrict your own logins.
4. Create the token. A service user cannot sign in to generate its own token, so an admin creates it in SQL, restricted to the role:
ALTER USER LAKEXPRESS_USER ADD PROGRAMMATIC ACCESS TOKEN lakexpress_token
  ROLE_RESTRICTION = 'LAKEXPRESS_ROLE'
  DAYS_TO_EXPIRY = 90;
The token is in the token_secret column of the result, displayed once: copy it right away, it goes into an environment variable in step 5. When it expires, sync fails to connect to Snowflake. This statement shows when each token of the user expires:
SHOW USER PROGRAMMATIC ACCESS TOKENS FOR USER LAKEXPRESS_USER;
Done when SHOW GRANTS TO ROLE LAKEXPRESS_ROLE; lists the five privileges of point 2 and nothing else.
A session opened with the token has the role LAKEXPRESS_ROLE and cannot change it: USE ROLE SYSADMIN fails with Current session is restricted. USE ROLE not allowed. Checked with this token: listing the stage works, and CREATE DATABASE, CREATE WAREHOUSE and DESC INTEGRATION are refused with Insufficient privileges. A token is also valid in one account only.
Part 2: run LakeXpress
Everything is in place. LakeXpress now needs one JSON file and three commands.
Step 5: the credentials file
Goal: one JSON file that tells LakeXpress how to reach the four systems.
Each entry has a name, and the commands refer to entries by name. Secrets use the $env{...} syntax: LakeXpress reads them from environment variables at run time, so the file holds no secret. In the LakeXpress directory, create lx_credentials.json:
{
  "lxdb_mssql": {
    "ds_type": "mssql",
    "auth_mode": "classic",
    "info": {
      "username": "$env{LX_LXDB_USER}",
      "password": "$env{LX_LXDB_PASSWORD}",
      "server": "localhost",
      "port": 1433,
      "database": "lxdb",
      "trust_server_certificate": true
    }
  },
  "ds_oracle": {
    "ds_type": "oracle",
    "auth_mode": "classic",
    "info": {
      "username": "$env{LX_ORACLE_USER}",
      "password": "$env{LX_ORACLE_PASSWORD}",
      "server": "localhost",
      "port": 1521,
      "database": "FREEPDB1"
    }
  },
  "aws_s3_stage": {
    "ds_type": "s3",
    "auth_mode": "profile",
    "info": {
      "directory": "s3://aetplakexpress/snowflake/",
      "profile": "lakexpress-writer"
    }
  },
  "snowflake_pat": {
    "ds_type": "snowflake",
    "auth_mode": "pat",
    "info": {
      "account": "your-snowflake-account",
      "user": "LAKEXPRESS_USER",
      "token": "$env{LX_SNOWFLAKE_TOKEN}",
      "warehouse": "COMPUTE_WH",
      "database": "LAKEXPRESS_DB",
      "stage": "AWSS3_AWDW_STAGE"
    }
  }
}
What to check in each entry:
lxdb_mssql, the LakeXpress DB.trust_server_certificateaccepts the self-signed certificate of a test server. Remove it if your server has a certificate signed by a trusted authority.ds_oracle, the Oracle source.databaseis the service name, not a SID. No Oracle client is needed.aws_s3_stage, the S3 folder.directoryis the stage URL of step 4.5, character for character.profileis the LakeXpress profile of step 4.1, not your admin profile.snowflake_pat, the Snowflake target:accountis the account identifier of step 4, without.snowflakecomputing.comuseris the service user of step 4.6. Its default role,LAKEXPRESS_ROLE, is the one the token is restricted towarehouseruns theCOPY INTOstatementsstageis the stage of step 4.5
Then set the environment variables, in the terminal where you run LakeXpress:
- Linux
- Windows (PowerShell)
export LX_LXDB_USER=lakexpress_admin
export LX_LXDB_PASSWORD='Your_LxdbPassword1'
export LX_ORACLE_USER=tpch
export LX_ORACLE_PASSWORD='your_oracle_password'
export LX_SNOWFLAKE_TOKEN='your_snowflake_pat_token'
$env:LX_LXDB_USER = "lakexpress_admin"
$env:LX_LXDB_PASSWORD = "Your_LxdbPassword1"
$env:LX_ORACLE_USER = "tpch"
$env:LX_ORACLE_PASSWORD = "your_oracle_password"
$env:LX_SNOWFLAKE_TOKEN = "your_snowflake_pat_token"
Every variable named in the file must be set for every command, even one that uses a single entry. Otherwise LakeXpress stops before doing anything:
[...] Failed to load credentials: Unexpected error reading JSON file lx_credentials.json: Environment variable 'LX_SNOWFLAKE_TOKEN' is not set
More about the credentials file
$env{...}is not limited to secrets: any value of the file can use it, a server name or an account identifier for example.- The Snowflake entry has two optional keys:
role, when the user's default role is not the one to use, andschema. - The
accountformat is described in Snowflake's account identifier page.
Step 6: initialize the LakeXpress DB
Goal: the LakeXpress tables created in lxdb.
The first sync would create them too, but running lxdb init now checks the license, the credentials file and the SQL Server connection in one go.
- Linux
- Windows (PowerShell)
./LakeXpress lxdb init \
  -a lx_credentials.json \
  --lxdb_auth_id lxdb_mssql
.\LakeXpress.exe lxdb init `
  -a lx_credentials.json `
  --lxdb_auth_id lxdb_mssql
Two arguments come back in every command: -a (long form --auth_file), the path to the credentials file, and --lxdb_auth_id, the entry of the LakeXpress DB in it.
Each log line starts with a timestamp, the level and the process, shortened to [...] here. The license lines are left out from now on.
[...] lxdb init: Creating export database schema...
[...] Initializing export database with mode: preserve
[...] Sequence 'seq_export_job_id' created successfully
[...] Export tables created/verified successfully
[...] All export database tables verified/created successfully
[...] Export database initialized successfully with mode: preserve
[...] Export database schema created successfully
The command can be run again safely: mode: preserve keeps existing tables and data.
The tables LakeXpress created
lxdb now holds 13 tables in the dbo schema. The ones you are most likely to query:
| Table | One row per |
|---|---|
export_syncs | Sync configuration |
export_runs | Run of the export phase |
export_jobs | Table exported in a run, with its status and row count |
export_files | Parquet file written, with its row count |
publish_runs | Run of the publication phase |
publish_jobs | Table published in a run |
Step 7: create the sync configuration
Goal: a stored configuration, oracle_tpch_to_snowflake, saying what to export, where to write it and how to publish it.
Nothing is exported yet. The configuration is stored in the LakeXpress DB under its sync_id and reused by every later run.
- Linux
- Windows (PowerShell)
./LakeXpress config create \
  -a lx_credentials.json \
  --lxdb_auth_id lxdb_mssql \
  --sync_id oracle_tpch_to_snowflake \
  --source_db_auth_id ds_oracle \
  --source_schema_name TPCH \
  --target_storage_id aws_s3_stage \
  --sub_path oracle_tpch \
  --publish_target snowflake_pat \
  --publish_method internal \
  --publish_schema_pattern "ORA_{schema}" \
  --n_jobs 4 \
  --fastbcp_p 2
.\LakeXpress.exe config create `
  -a lx_credentials.json `
  --lxdb_auth_id lxdb_mssql `
  --sync_id oracle_tpch_to_snowflake `
  --source_db_auth_id ds_oracle `
  --source_schema_name TPCH `
  --target_storage_id aws_s3_stage `
  --sub_path oracle_tpch `
  --publish_target snowflake_pat `
  --publish_method internal `
  --publish_schema_pattern "ORA_{schema}" `
  --n_jobs 4 `
  --fastbcp_p 2
The arguments read as a sentence: export schema TPCH of ds_oracle, to the folder oracle_tpch of aws_s3_stage, then load it into snowflake_pat as internal tables, 4 tables at a time.
| Argument | Value | Description |
|---|---|---|
--sync_id | oracle_tpch_to_snowflake | Name of this configuration: 1 to 64 letters, digits, _ or -. Generated (sync-20261116-17eef4) if omitted |
| Source | ||
--source_db_auth_id | ds_oracle | Credentials entry of the Oracle source |
--source_schema_name | TPCH | Schema to export. Several schemas are separated by commas |
| Storage | ||
--target_storage_id | aws_s3_stage | Credentials entry of the S3 folder |
--sub_path | oracle_tpch | Sub-folder of the S3 folder for this sync |
| Publication | ||
--publish_target | snowflake_pat | Credentials entry of the Snowflake target |
--publish_method | internal | Load the data into Snowflake tables (the default, external, leaves it in S3) |
--publish_schema_pattern | ORA_{schema} | Name of the target schema; {schema} is the source schema, so ORA_TPCH |
| Parallelism | ||
--n_jobs | 4 | Number of tables exported at the same time (default 1) |
--fastbcp_p | 2 | Number of parallel streams within one large table (default 1) |
With these values, up to 4 × 2 = 8 connections read from Oracle at the same time.
LakeXpress confirms the sync_id and prints the commands to run next:
[...] No --source_db_name specified, defaulting to 'FREEPDB1' from credentials
[...] Created sync configuration: oracle_tpch_to_snowflake
[...] Sync configuration created successfully!
config create does not connect to Oracle, S3 or Snowflake. The first sync tests these connections.
Full output, arguments left at their default, and config list
[...] config create: Creating sync configuration...
[...] No --source_db_name specified, defaulting to 'FREEPDB1' from credentials
[...] Created sync configuration: oracle_tpch_to_snowflake
[...]
[...] ============================================================
[...] Sync configuration created successfully!
[...]
[...]   sync_id: oracle_tpch_to_snowflake
[...]
[...] Use this sync_id with the following commands:
[...]   .\LakeXpress.exe sync -a lx_credentials.json --lxdb_auth_id lxdb_mssql --sync_id oracle_tpch_to_snowflake
[...]   .\LakeXpress.exe 'sync[export]' -a lx_credentials.json --lxdb_auth_id lxdb_mssql --sync_id oracle_tpch_to_snowflake
[...]   .\LakeXpress.exe 'sync[publish]' -a lx_credentials.json --lxdb_auth_id lxdb_mssql --sync_id oracle_tpch_to_snowflake
[...] ============================================================
Some arguments are left at their default value:
| Argument | Default | Description |
|---|---|---|
--compression_type | Zstd | Parquet compression: Zstd, Snappy, Gzip, Lz4 or None |
--large_table_threshold | 100000 | Estimated row count from which a table is split and read in parallel |
--error_action | fail | fail stops at the first table in error, continue goes on with the others |
--include, --exclude | none | Table name patterns, to export only a part of the schema |
--publish_table_pattern | {table} | Name of the target tables |
--pk_constraints | off | Declare the source primary keys on the Snowflake tables |
config list shows the configurations stored in the LakeXpress DB:
./LakeXpress config list -a lx_credentials.json --lxdb_auth_id lxdb_mssql
[...] Found 1 sync configuration(s):
[...]
[...]   oracle_tpch_to_snowflake  [default]  source=ds_oracle  enabled  created=2026-11-16 18:08:24.910000
A configuration is not edited in place. To change it, delete it with config delete --sync_id oracle_tpch_to_snowflake --confirm, then create it again.
Step 8: run the sync
Goal: the 8 tables exported to S3 and loaded into Snowflake.
- Linux
- Windows (PowerShell)
./LakeXpress sync \
  -a lx_credentials.json \
  --lxdb_auth_id lxdb_mssql \
  --sync_id oracle_tpch_to_snowflake
.\LakeXpress.exe sync `
  -a lx_credentials.json `
  --lxdb_auth_id lxdb_mssql `
  --sync_id oracle_tpch_to_snowflake
sync runs two phases. First the export: LakeXpress discovers the tables, sorts them by estimated row count, and exports them 4 at a time to S3:
[...] Created export run: 20261118-674f93bd-caef-4ef6-ac3d-4bd2733c5c04
[...] Discovered 8 tables in schema TPCH
[...] Parallel execution completed: 8 successful, 0 failed
[...] Total Parquet export           - time (s) :     19.192
Then the publication: LakeXpress checks the stage, creates the ORA_TPCH schema and its tables in Snowflake, and loads them with COPY INTO:
[...] Stage path matches storage directory: s3://aetplakexpress/snowflake/
[...] Created 8/8 tables
[...]   Total rows loaded: 8,661,245
[...] Publish: 8/8 tables succeeded (snowflake - internal)
[...] Total publication              - time (s) :     16.612
[...] Total elapsed                  - time (s) :     35.816
That is the whole run: 8.66 million rows in under 36 seconds, on a laptop, with Oracle in a local container, and S3 and Snowflake in eu-west-1.
| Phase | Time (s) |
|---|---|
| Export | 19.2 |
| Publication | 16.6 |
| Total | 35.8 |
The tables are internal tables, which Snowflake calls standard tables, as opposed to external tables: the data is copied into Snowflake and no longer depends on the files on S3.
Each run also writes two files in the current directory: lx_<date>_<time>_<run_id>.log, the full log including what FastBCP printed, and a .yml file with the configuration of the run. --log_dir <path> sends them elsewhere.
Everything is also recorded in the LakeXpress DB on SQL Server: the run, each table with its method, row count and timings, each Parquet file written, and the publication of each table. status reads it, and step 9 queries it.
Export log, in more detail
More of what the console shows during the export. The complete log is in the .log file of the run.
LakeXpress starts by testing the connections to the LakeXpress DB and to Oracle, and by locating the bundled engine:
[...] FastBCP version: 1.6.8
[...] Source extraction: oraodp (native)
[...]
[...] ============================================================
[...] Executing sync: oracle_tpch_to_snowflake
[...] ============================================================
[...]
[...] Source database: ds_oracle
[...] Source database name: FREEPDB1
[...] Source schemas: TPCH
[...] Target storage: aws_s3_stage
[...] FastBCP path: C:\Users\you\LakeXpress\engine
[...] Parallel degree: 2
[...] Concurrent jobs: 4
[...]
[...] Testing source database connection...
[...] Source database connection successful
[...] Created export run: 20261118-674f93bd-caef-4ef6-ac3d-4bd2733c5c04
The run ID starts with the date. It identifies this run in the LakeXpress DB and in the names of the log files. LakeXpress then discovers the tables of the TPCH schema and sorts them by estimated row count, largest first:
[...] Discovering tables in oracle schema: TPCH
[...] Discovered 8 tables in schema TPCH
[...] Tables sorted by estimated row count (largest first) across all schemas:
[...]   1. TPCH.LINEITEM (6,001,215 rows)
[...]   2. TPCH.ORDERS (1,500,000 rows)
[...]   3. TPCH.PARTSUPP (800,000 rows)
[...]   4. TPCH.PART (200,000 rows)
[...]   5. TPCH.CUSTOMER (150,000 rows)
[...]   6. TPCH.SUPPLIER (10,000 rows)
[...]   7. TPCH.NATION (25 rows)
[...]   8. TPCH.REGION (5 rows)
[...] Processing jobs with parallelism: n_jobs=4
[...] Starting parallel execution with 4 workers
[...] Parallel execution completed: 8 successful, 0 failed
[...] Export completed: 8 jobs processed successfully for run 20261118-674f93bd-caef-4ef6-ac3d-4bd2733c5c04
[...] Total Parquet export           - time (s) :     19.192
[...]
[...] ============================================================
[...] RUN SUMMARY
[...] ============================================================
[...] Export: 8/8 tables succeeded
[...] ============================================================
Starting with the largest tables keeps the end of the run short: the last table to finish is not a large one started late.
How each table was read
For each table, LakeXpress starts one FastBCP process and picks its method from the row estimate:
| Tables | Estimated rows | Method | Streams | Files |
|---|---|---|---|---|
LINEITEM, ORDERS, PARTSUPP, PART, CUSTOMER | 100,000 or more | Rowid | 2 | 2 per table |
SUPPLIER, NATION, REGION | Under 100,000 | None | 1 | 1 per table |
100,000 is the default --large_table_threshold. With the Rowid method, the table is split into ranges of physical row addresses, and each of the 2 streams set by --fastbcp_p reads its own range and writes its own Parquet file. No key column or index is needed.
Publication log, in more detail
More of what the console shows during the publication. The complete log is in the .log file of the run.
[...] Publishing to Snowflake (creating internal tables)...
[...] ======================================================================
[...] SNOWFLAKE INTERNAL TABLE PUBLISHING
[...] ======================================================================
[...] Run ID: 20261118-674f93bd-caef-4ef6-ac3d-4bd2733c5c04
[...] Target Database: LAKEXPRESS_DB
[...] Stage: AWSS3_AWDW_STAGE
[...] Schema Pattern: ORA_{schema}
[...]
[...] Connecting to Snowflake...
[...] Connected as LAKEXPRESS_USER (role: LAKEXPRESS_ROLE)
[...]
[...] Validating stage path: LAKEXPRESS_DB.PUBLIC.AWSS3_AWDW_STAGE
[...] Stage path matches storage directory: s3://aetplakexpress/snowflake/
[...] Generated DDL for 1 schemas, 8 tables, 8 COPY INTO statements
[...]
[...] Creating schemas...
[...]   "ORA_TPCH"
[...] Created 1/1 schemas
[...]
[...] Processing 8 internal tables (sorted by size, largest first)
[...] Using parallel processing with 4 workers (loky backend)
[...]
[...]   PART (200,000 rows, 5.2s)
[...]   PARTSUPP (800,000 rows, 6.6s)
[...]   ORDERS (1,500,000 rows, 7.2s)
[...]   CUSTOMER (150,000 rows, 4.0s)
[...]   SUPPLIER (10,000 rows, 3.3s)
[...]   NATION (25 rows, 3.4s)
[...]   REGION (5 rows, 2.5s)
[...]   LINEITEM (6,001,215 rows, 13.6s)
[...]
[...] Created 8/8 tables
[...]   Total rows loaded: 8,661,245
[...]
[...] ======================================================================
[...] PUBLISHING COMPLETE - ALL OBJECTS CREATED SUCCESSFULLY
[...] ======================================================================
[...]
[...] Publish: 8/8 tables succeeded (snowflake - internal)
[...] Total publication              - time (s) :     16.612
[...] Total elapsed                  - time (s) :     35.816
Step 9: check the results
Goal: confirm that every row arrived, from three points of view: the LakeXpress DB, S3 and Snowflake.
In Snowflake
In a Snowflake worksheet:
USE DATABASE LAKEXPRESS_DB;

SELECT table_name, row_count
FROM information_schema.tables
WHERE table_schema = 'ORA_TPCH'
ORDER BY row_count DESC;
| TABLE_NAME | ROW_COUNT |
|---|---|
| LINEITEM | 6001215 |
| ORDERS | 1500000 |
| PARTSUPP | 800000 |
| PART | 200000 |
| CUSTOMER | 150000 |
| SUPPLIER | 10000 |
| NATION | 25 |
| REGION | 5 |
These are the row counts of the Oracle tables, 8,661,245 rows in total. The column types follow the Oracle definitions:
DESC TABLE ORA_TPCH.ORDERS;
| name | type | kind | null? |
|---|---|---|---|
| O_ORDERKEY | NUMBER(19,0) | COLUMN | Y |
| O_CUSTKEY | NUMBER(10,0) | COLUMN | Y |
| O_ORDERSTATUS | VARCHAR(1) | COLUMN | Y |
| O_TOTALPRICE | NUMBER(15,2) | COLUMN | Y |
| O_ORDERDATE | TIMESTAMP_NTZ(0) | COLUMN | Y |
| O_ORDERPRIORITY | VARCHAR(15) | COLUMN | Y |
| O_CLERK | VARCHAR(15) | COLUMN | Y |
| O_SHIPPRIORITY | NUMBER(10,0) | COLUMN | Y |
| O_COMMENT | VARCHAR(79) | COLUMN | Y |
| Oracle column | Oracle type | Snowflake type |
|---|---|---|
O_ORDERKEY | NUMBER(19) | NUMBER(19,0) |
O_ORDERSTATUS | CHAR(1) | VARCHAR(1) |
O_TOTALPRICE | NUMBER(15,2) | NUMBER(15,2) |
O_ORDERDATE | DATE | TIMESTAMP_NTZ(0) |
O_ORDERPRIORITY | VARCHAR2(15) | VARCHAR(15) |
The NOT NULL constraints of the Oracle columns are not carried over (null? is Y everywhere), and the primary keys are declared only with --pk_constraints, in step 7.
An Oracle DATE holds a time of day down to the second, so it becomes a TIMESTAMP_NTZ(0). A Snowflake DATE would drop that time. The values are the Oracle ones:
SELECT MIN(o_orderdate), MAX(o_orderdate) FROM ORA_TPCH.ORDERS;
| MIN(O_ORDERDATE) | MAX(O_ORDERDATE) |
|---|---|
| 1992-01-01 00:00:00 | 1998-08-02 00:00:00 |
The full list of mappings is in the Snowflake reference.
LakeXpress creates the tables and columns with quoted names, in the case of the source. Oracle stores unquoted names in upper case, like Snowflake, so ORA_TPCH.LINEITEM and l_shipdate can be written without quotes and in any case.
With the tables in place, TPC-H query 1 runs as is:
SELECT
    l_returnflag,
    l_linestatus,
    SUM(l_quantity) AS sum_qty,
    SUM(l_extendedprice) AS sum_base_price,
    SUM(l_extendedprice * (1 - l_discount)) AS sum_disc_price,
    AVG(l_discount) AS avg_disc,
    COUNT(*) AS count_order
FROM ORA_TPCH.LINEITEM
WHERE l_shipdate <= DATEADD(day, -90, '1998-12-01'::DATE)
GROUP BY l_returnflag, l_linestatus
ORDER BY l_returnflag, l_linestatus;
| L_RETURNFLAG | L_LINESTATUS | SUM_QTY | SUM_BASE_PRICE | SUM_DISC_PRICE | AVG_DISC | COUNT_ORDER |
|---|---|---|---|---|---|---|
| A | F | 37734107.00 | 56586554400.73 | 53758257134.8700 | 0.04998530 | 1478493 |
| N | F | 991417.00 | 1487504710.38 | 1413082168.0541 | 0.05009343 | 38854 |
| N | O | 74476040.00 | 111701729697.74 | 106118230307.6056 | 0.04999659 | 2920374 |
| R | F | 37719753.00 | 56568041380.90 | 53741292684.6040 | 0.05000941 | 1478870 |
These are the reference answers of TPC-H query 1 at scale factor 1.
In the LakeXpress DB
- Linux
- Windows (PowerShell)
./LakeXpress status \
  -a lx_credentials.json \
  --lxdb_auth_id lxdb_mssql \
  --sync_id oracle_tpch_to_snowflake
.\LakeXpress.exe status `
  -a lx_credentials.json `
  --lxdb_auth_id lxdb_mssql `
  --sync_id oracle_tpch_to_snowflake
[...] Sync Status: oracle_tpch_to_snowflake
[...]
[...]   Total Runs (recent):  10
[...]   Completed:            10
[...]   Failed:               0
[...]   Running:              0
[...]
[...]   Latest Run:
[...]     Run ID:    20261118-674f93bd-caef-4ef6-ac3d-4bd2733c5c04
[...]     Status:    completed
[...]     Created:   2026-11-18 08:00:56.560000
[...]     Jobs:      8 total, 8 completed, 0 failed
[...]
[...] Use --verbose for detailed list of all runs
Ten runs are listed because the sync was run several times while this tutorial was written. --verbose lists every run, and --run_id <id> shows one run in detail.
The same information with SQL, table by table
SELECT j.source_table,
       j.fastbcp_method AS method,
       j.fastbcp_parallel_degree AS streams,
       j.num_files AS files,
       j.num_rows_exported AS rows_exported,
       DATEDIFF(millisecond, j.started_at, j.completed_at) / 1000.0 AS export_s,
       p.rows_loaded,
       CAST(p.elapsed_seconds AS DECIMAL(6,1)) AS publish_s
FROM dbo.export_jobs j
JOIN dbo.publish_jobs p ON p.export_job_id = j.job_id
WHERE j.run_id = '20261118-674f93bd-caef-4ef6-ac3d-4bd2733c5c04'
ORDER BY j.num_rows_exported DESC;
| source_table | method | streams | files | rows_exported | export_s | rows_loaded | publish_s |
|---|---|---|---|---|---|---|---|
| LINEITEM | Rowid | 2 | 2 | 6001215 | 17.183 | 6001215 | 13.6 |
| ORDERS | Rowid | 2 | 2 | 1500000 | 5.896 | 1500000 | 7.2 |
| PARTSUPP | Rowid | 2 | 2 | 800000 | 3.620 | 800000 | 6.6 |
| PART | Rowid | 2 | 2 | 200000 | 3.200 | 200000 | 5.2 |
| CUSTOMER | Rowid | 2 | 2 | 150000 | 4.217 | 150000 | 4.0 |
| SUPPLIER | None | 1 | 1 | 10000 | 1.780 | 10000 | 3.3 |
| NATION | None | 1 | 1 | 25 | 1.343 | 25 | 3.4 |
| REGION | None | 1 | 1 | 5 | 1.337 | 5 | 2.5 |
export_jobs has one row per table and per run, publish_jobs one row per published table. For each table, the number of rows exported from Oracle equals the number of rows loaded into Snowflake. Each later sync[publish] of the same run adds one row per table to publish_jobs, so the query then returns one line per table and per publication.
On S3
Each table has its own folder under <sub_path>/<schema>/. The listing uses your admin profile, because the LakeXpress user cannot list the bucket:
aws s3 ls s3://aetplakexpress/snowflake/oracle_tpch/ --recursive --profile your-admin-profile
| Date | Size (bytes) | Object |
|---|---|---|
| 2026-11-18 08:01:03 | 3942349 | snowflake/oracle_tpch/TPCH/CUSTOMER/CUSTOMER_chunk_000.parquet |
| 2026-11-18 08:01:03 | 4264369 | snowflake/oracle_tpch/TPCH/CUSTOMER/CUSTOMER_chunk_001.parquet |
| 2026-11-18 08:01:00 | 87998836 | snowflake/oracle_tpch/TPCH/LINEITEM/LINEITEM_chunk_000.parquet |
| 2026-11-18 08:01:00 | 89464144 | snowflake/oracle_tpch/TPCH/LINEITEM/LINEITEM_chunk_001.parquet |
| 2026-11-18 08:01:05 | 2476 | snowflake/oracle_tpch/TPCH/NATION/NATION.parquet |
| 2026-11-18 08:01:00 | 19560471 | snowflake/oracle_tpch/TPCH/ORDERS/ORDERS_chunk_000.parquet |
| 2026-11-18 08:01:00 | 20242600 | snowflake/oracle_tpch/TPCH/ORDERS/ORDERS_chunk_001.parquet |
| 2026-11-18 08:01:00 | 2444797 | snowflake/oracle_tpch/TPCH/PART/PART_chunk_000.parquet |
| 2026-11-18 08:01:00 | 2548741 | snowflake/oracle_tpch/TPCH/PART/PART_chunk_001.parquet |
| 2026-11-18 08:01:00 | 13888517 | snowflake/oracle_tpch/TPCH/PARTSUPP/PARTSUPP_chunk_000.parquet |
| 2026-11-18 08:01:00 | 14438126 | snowflake/oracle_tpch/TPCH/PARTSUPP/PARTSUPP_chunk_001.parquet |
| 2026-11-18 08:01:06 | 1414 | snowflake/oracle_tpch/TPCH/REGION/REGION.parquet |
| 2026-11-18 08:01:03 | 522744 | snowflake/oracle_tpch/TPCH/SUPPLIER/SUPPLIER.parquet |
13 files, 247 MiB in total with Zstd compression. The tables read by 2 streams have 2 files, <TABLE>_chunk_000.parquet and <TABLE>_chunk_001.parquet. The others have a single <TABLE>.parquet.
Running it again
The configuration is stored, so a later run only needs the sync_id:
| Command | What it does |
|---|---|
sync | A new run: export, then publication |
'sync[export]' | The export only. The files land on S3, Snowflake is not touched |
'sync[publish]' | The publication only, from the files of the latest completed export |
sync --resume | Continues an interrupted run: the tables already exported are skipped |
They all take the same -a, --lxdb_auth_id and --sync_id arguments as in step 8. The quotes around sync[export] and sync[publish] keep the shell from interpreting the brackets.
Each run gives a fully refreshed copy: if a target table already exists in Snowflake, LakeXpress drops it and creates it again from the Parquet files, with no duplicate rows. sync[publish] alone rebuilds the Snowflake tables without reading Oracle again, for example after one was dropped or altered by mistake.
Grants given on them to other roles are lost at each run, unless they come from future grants on the schema. And each dropped version stays in Time Travel, then 7 days in Fail-safe, which adds storage cost when large tables are reloaded often.
What was checked
- A second
syncwrote the Parquet files under the same names: the 13 objects on S3 were replaced, with new timestamps, and no file was left over from the previous run sync[publish]alone took 14.9 seconds. It starts withPublishing latest completed run: 20261118-674f93bd-..., drops and recreates the 8 tables, and loads the same 8,661,245 rows
Troubleshooting
| Symptom | Cause and fix |
|---|---|
No LakeXpress licence found | The license file is not where LakeXpress looks. See Other places for the license in step 1 |
Environment variable 'LX_...' is not set | A variable named in the credentials file is missing in this terminal. Set all of them, see step 5 |
| The connection to the LakeXpress DB fails | Run the sqlcmd check of step 3. SQL Server logins and TCP port 1433 must be enabled |
The user must have SELECT_CATALOG_ROLE | The GRANT SELECT_CATALOG_ROLE of step 2 was not run |
| The tables are listed with 0 rows and exported in one file each | The Oracle statistics were never gathered. Run DBMS_STATS.GATHER_SCHEMA_STATS, see step 2 |
Snowflake stage URL does not match the storage directory | The directory of the S3 entry and the URL of the stage differ. Make them identical, see step 4.5 |
LIST @stage fails with an access error | The trust policy or the read policy of the IAM role does not match. See steps 4.2 and 4.4 |
Error assuming AWS_ROLE ... not authorized to perform: sts:AssumeRole, with a correct trust policy | The Snowflake account is in an AWS opt-in region that is disabled in your AWS account. Use a Snowflake account in the region of the bucket, see step 4 |
Programmatic access token is invalid | The user is not the user the token was created for, or the token belongs to another account. See step 4.6 |
Network policy is required | The Snowflake user has no network policy. See step 4.6 |
Insufficient privileges to operate on ... during the publication | LAKEXPRESS_ROLE lacks one of the grants of step 4.6, or the target schema already exists and belongs to another role. SHOW GRANTS TO ROLE LAKEXPRESS_ROLE; lists what it has |
AccessDenied ... s3:ListBucket with the LakeXpress profile | Expected: the LakeXpress IAM user can only write. List the bucket with your admin profile, see step 4.1 |
Current session is restricted. USE ROLE not allowed | The token is tied to one role, here LAKEXPRESS_ROLE. Run admin statements from a worksheet |
SSL validation failed ... unable to get local issuer certificate from the AWS CLI | An antivirus or a proxy inspects HTTPS with its own certificate. Export the trusted root certificates of the machine to a PEM file and set AWS_CA_BUNDLE to its path |
| A run was interrupted and the next one reports locked tables | lxdb locks shows the locks, lxdb release-locks --confirm releases the stale ones |
For more detail on a failing run, add --log_level DEBUG to the command and read the .log file of the run.
What just happened?
LakeXpress read the list of tables of the TPCH schema from the Oracle catalog. For each table, the bundled FastBCP engine extracted the rows, in parallel ROWID ranges for the large tables, and wrote Zstd-compressed Parquet files straight to S3. LakeXpress then created the target schema and tables in Snowflake, with types derived from the Oracle column definitions, and loaded the files with COPY INTO. Each step was recorded in the SQL Server LakeXpress DB, which is where status reads from.
To refresh the Snowflake tables, run the same sync command again. The documentation covers what comes next: incremental syncs, table filtering, external tables and the other publishing targets.